Bake Like A Cook

relax! It's just baking…

Simple Brittle Crunch

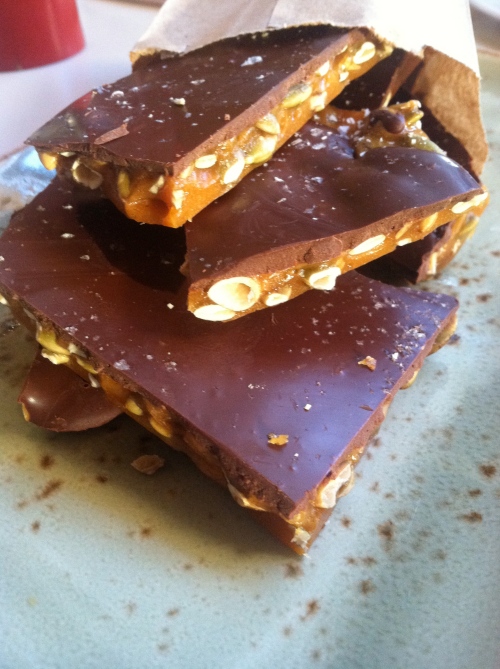
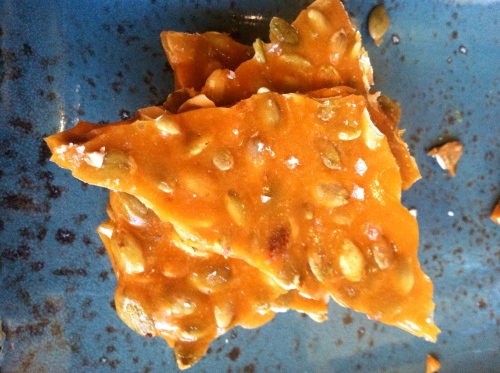
Pumpkin seed brittle in all it's glory!

Pumpkin seed brittle in all it’s glory!

One of the perks of my job as a pastry chef is getting to make candies and confections..it’s literally in my job description!  Candies and confections are typically made by carefully cooking a sugar mixture to a specific temperature, which requires an accurate thermometer, non-humid conditions and a watchful eye.  A favorite quick treat I like to make is this brittle–its fast, easy and requires no thermometer like many of its confection counterparts.  There are also a number of variations–from leaving plain to covering it with a thick layer of dark chocolate and flaky sea salt, and varying the nuts or seeds. Once you are set up, you can literally have a delicious brittle in 30 minutes!!  And any small pieces and broken tidbits make a fabulous topping for ice cream!

Pumpkin seed brittle with even more glory...and chocolate!

Pumpkin seed brittle with even more glory…and chocolate!

Pumpkin Seed Brittle Crunch (with variations)

1 cup sugar

1/2 cup Karo light corn syrup

5T butter, cut up

1t salt

1t vanilla extract

1t baking soda (sift if it has lumps)

about 1 cup toasted pumpkin seeds (or toasted sunflower seeds, or toasted sesame seeds, or peanuts, toasted sliced almonds–you get the picture!!!)

tempered dark chocolate or chocolate chips & sea salt (optional, but recommended!!)

Have ready a sheet pan lined with a silpat, or parchment paper that has been sprayed with non stick spray.  Combine the sugar and corn syrup in a small saucepan and cook on medium high heat, swirling pan to be sure all ingredients are incorporated.  Cook without stirring until the mixture is caramel in color–you want a nice caramel color but not smoking!  If you mixture smokes, it will be too bitter and you should start again.  Once your mixture has become a beautiful golden caramel, add the butter to stop the cooking and carefully stir (mixture will bubble up!).  Add the vanilla and salt, then add the baking soda and mix quickly to disperse.  The mixture will become foamy and opaque.  Add the seeds or nuts if using and stir to just incorporate.  Immediately and carefully pour mixture onto prepared sheet pan, pouring to fill the tray as much as possible (i personally like thinner brittle so I roll it between two silpats with a rolling pin).  Sprinkle top with sea salt, or top with chocolate chips, spread thin and then top with sea salt.  If you are using tempered chocolate, wait until the brittle has cooled and then spread with chocolate.  Allow all to cool and chocolate to set.  Break into pieces and try to resist eating it all!!!

Must Have Monday!!

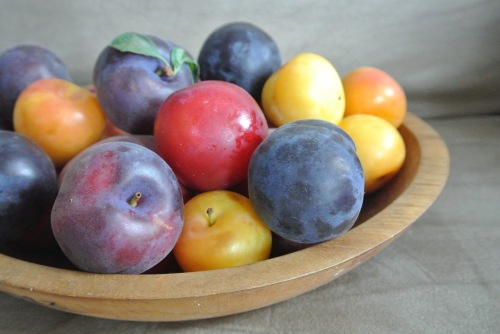
They are real...and they are spectacular!

They are real…and they are spectacular!

Welcome back to Must Have Monday!!  Today we must have an appreciation for all the beautiful summer fruits that the farmers bring to the local markets.  I am fortunate enough to have a market virtually in the back yard of my apartment!!  And for me, it is such a thrill even to just window shop in the market for all the colorful photo ops.  Nature sure does have a beautiful pallet!  This past market, I got a little overzealous with the plums, peaches and blueberries–they were just too beautiful and tasty to resist!  Hmmm…I think I sense fruit again in the the next recipe post…..  Support your local farmers today!  Or at least go admire the view : )

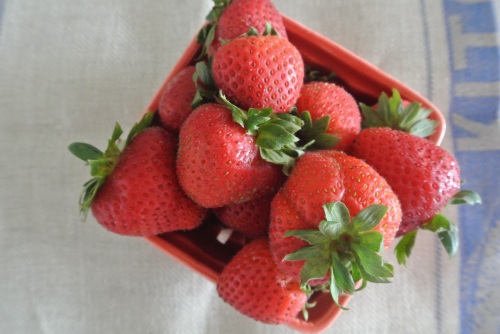
More beautiful fruit...

More beautiful fruit…

Nature's Rainbow!

Nature’s Rainbow!

What jam looks like before it's jam : )

What jam looks like before it’s jam : )


In a (Delicious) Jam!

Ready for jam!

Ready for jam!

Summertime brings about some pretty amazing fruits, which, as a pastry chef, is such a welcome change from the derth of fruit the past several months!!  Depending where you are in the country, the growing seasons can greatly differ.  For example, here in New York we see much shorter local berry seasons than in, say, North Carolina.  So when the fruits start showing up at the markets, there’s a feeding frenzy!!  A great way to utilize any fruit surplus is to make a batch of jam.

Jam!

Jam!

Jams are made with whole fruits (unlike jellies which use just the juice), sugar and lemon juice.  That’s all you need.  On occasion, depending upon what kind of fruit you are using to make the jam, a recipe may call for pectin.  Pectin is a substance which naturally occurs in fruits that help form a gel when it is cooked with sugar and some acid.  Some fruits lack enough natural pectin and require a small amount to be added to help the gel form.  Fruits low in pectin include raspberries and peaches.  Fruits high in natural pectin include apples, plums & quince.  Sometimes, a combination of fruit yields a sufficient amount of pectin (as we count on here with the mixed berries!).  Also, contrary to popular belief, fruits which are slightly under ripe contain more pectin than overripe fruit.  A great reference–besides the internet!– for jam making (and other home canning projects) is the Ball Blue Book of Canning.  I prefer to pick up the older versions which can easily be found on ebay.  I love old canning books–they have so much to teach us!!

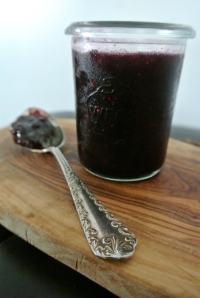
Jam, side view!

Jam, side view!

So here I found a small surplus of berries, and a lack of jam in the fridge–a perfect excuse to make some jam!  Make as little or as much as you like, you just need to scale the recipe up or down accordingly.  Now you have a reason to make some fresh bread!!  Besides being delicious on toast, its also wonderful stirred into plain greek yogurt–you can make it as sweet as you like.  Get jamming!! : )

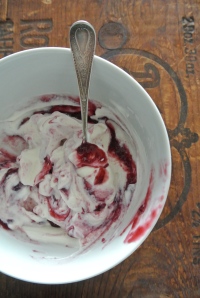
Fresh Jam stirred into Greek Yogurt--DELICIOUS!

Fresh Jam stirred into Greek Yogurt–DELICIOUS!

Delicious Mixed Berry Vanilla Bean Jam

1 pint Strawberries, washed, hulled and cut up

1/2 pint Blueberries, washed and dried

1/2 pint Blackberries, washed and dried

1 cup sugar

1-2 Tablespoons fresh lemon juice

1 vanilla bean, split and scraped (optional but very tasty!!)

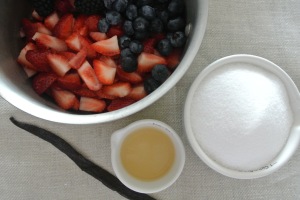
Ready to jam!

Ready to jam!

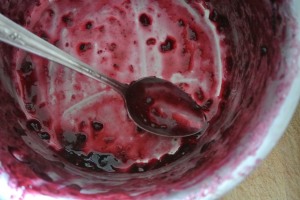
Combine all ingredients (including the vanilla bean) in a heavy medium sauce pan.  Bring mixture to a boils, stirring well to be sure no undissolved sugar remains.  Crush fruit with the back of the spoon if desired.  Boil mixture on medium to medium high heat until mixture becomes thick and viscous, and falls off the spoon together in one large drop (rather than several small ones).  Remove vanilla bean.

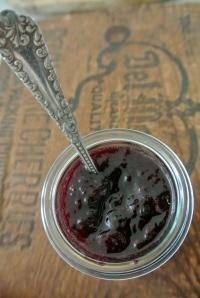
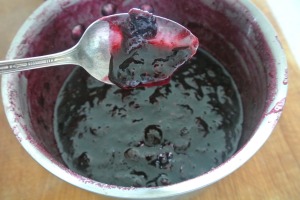
Finished product--thick and jellied

Finished product–thick and jellied…and a beautiful color!

Pour jam into 2 clean pint jars, clean top and seal immediately.  Cool and store in refrigerator.

Time for More Jam!

Time for More Jam!

Tips from A Cook:  

Be creative with whatever kind of fruit you want to use!  Be sure to check on line or a canning manual to see if your fruit needs extra pectin to make it gel.

This recipe makes two pint jars–keep one and give one as a gift!

***PLEASE NOTE THE BLOG POST ENDS HERE!  I HAVE NOT POSTED ANYTHING (VIDEOS, ETC) AT THE END OF THIS BLOG***

Must Have Monday!

Welcome back to Must Have Monday!!  Wow-a week already flew by!  Today’s must have is ….drumroll please….Ramekins!!

So many uses!!!

So many uses!!!

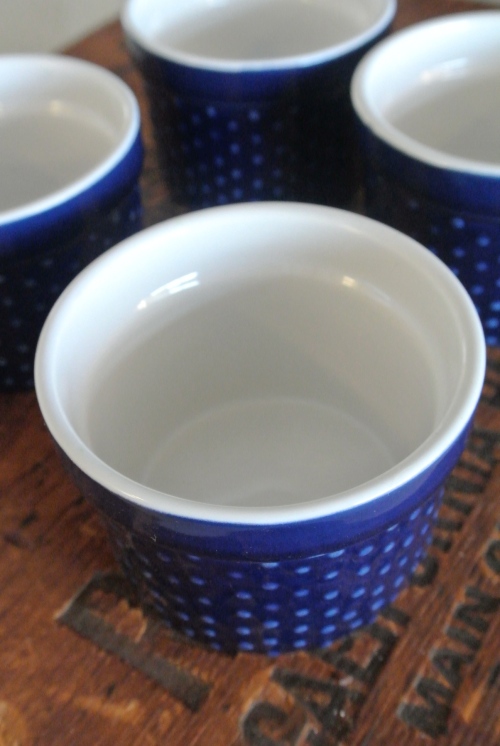
Ramekins come in all shapes and sizes, but for me, everyone should have a good set of 4 oz ramekins.  They are the perfect size to make individual souffles, custards and cakes, as well as scale out mise en place for recipes, serve sides of sauces…the uses are endless!!  By a set, I mean at least 4 or more.  The ones pictured here were purchased at Home Goods and were sold by the half dozen (and for only $5.99!!).  Don’t feel you need to spend a lot–trust me, expensive ramekins from France break just the same as those made in China!  It just hurts more…

Must Have Monday!!

A Must Have for your cookbook library!

A Must Have for your cookbook library!

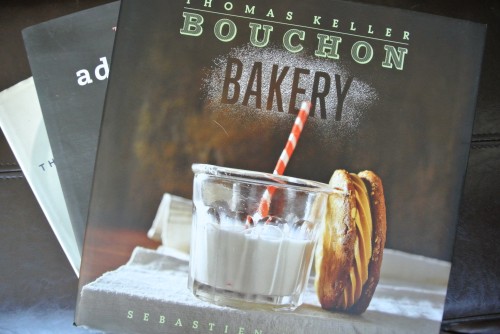
I would like to share with you the first “Must Have Monday”–fun tools, books and other things you never knew you needed in your life!!  Today we start off with a fabulous cookbook:  Bouchon Bakery (or any of the books from Thomas Keller!!).

If you know just one chef, it should be Thomas Keller–not an outrageous, loud-mouthed one on tv.  You can read more about him here.  He is an exemplary chef with incredibly high standards–and puts out beautiful coffee table sized cookbooks with delicious recipes!  His most recent release was Bouchon Bakery (lucky me!!) with his incredibly talented executive pastry chef Sebastien Rouxel.  This book runs the gamut from simple to stunning and doesn’t disappoint.  For those of you unfamiliar with this beautiful bakery–check it out here!  We are not responsible for any drooling you may experience….

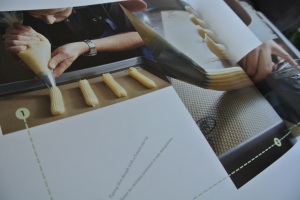
Lots of Instructional pictures..

Lots of instructional pictures..

And check out THIS centerfold!! : )

The Simple Joy of Homemade Bread

Homemade Goodness...

Homemade Goodness…

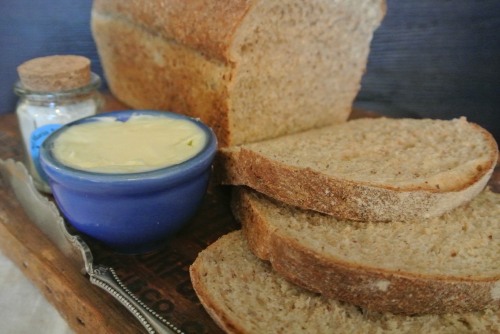
I will never be on a carb free diet– I just love gummy bears and fresh bread way too much to EVER give them up!  And speaking of fresh bread…there is nothing more delicious than fresh-from-the-oven homemade bread with some cold butter and a sprinkle of coarse salt!!  I could live off this meal, with gummy bears for dessert of course : )

Homemade bread is a scarcity these days.  With supermarkets housing in-store bakeries and great local artisan bakeshops serving up craft breads, few people attempt to make their own at home.  Making bread can be quite daunting to try, but it is really quite simple and can be worked into anyone’s schedule.

I decided to make these loaves after I bought a 12 grain sandwich loaf of bread from my local grocer.  After reading the ingredient list, the “12 grain” part was actually quite small–less than 2% of the ingredients!  Making my own bread lets me add as much and whatever kind of whole grains I want.  But don’t feel bound by the recipe here–this recipe reflects what I had hanging around in my kitchen!  Any different grains can be used–that’s the beauty of bread.  Think of it as a game of checks and balances between the flour and the liquid.  Different flours pick up different amounts of water–even different regions can show many variations.  This is the reason many bread recipes will give you a range of flour and tell you to add more if the dough is too wet or add some more water if the dough is too dry.  Just resist the urge to add a lot of flour–as the dough will sit, the flour absorbs more of the liquid and you will notice the dough will not be as wet as you originally thought.  Try to err on the side of a dough with a little bit of tackiness rather than a dough that is so dry it sticks to nothing.

When it comes to whole grains, they can weigh a bread down and tend to be on the denser side.  This is why I like to blend in some bread flour to help the bread have a lighter texture (how I prefer my sandwich bread).  There are some great grains out there these days–and they can easily be substituted into your artisan loaves.  I also make this bread with a starter.  Don’t be intimidated!!  Its very easy to make and really adds some nice flavor to the bread as well as keeps it moist and gives it a longer shelf life.  I urge you to give bread a try at home–and tell me that there is no greater satisfaction than a pulling your beautiful homemade bread from the oven…other than opening a fresh bag of gummy bears!!

For the starter

1 cup water, room temperature

1 1/4 teaspoons dry active yeast

1 3/4 cup all purpose flour

Dissolve the yeast in the water and add the flour.  Mix well.  The mixture should look like thick, sticky pancake batter.
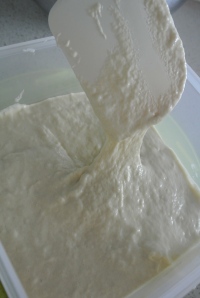
Getting Started!

Getting Started!

If the mixture is too thick, add a bit of water; too runny add a tablespoon or so of flour to achieve this consistency.  scrape the mixture into a container that will allow for the mixture to expand about 3x its size.  Cover with a lid or with plastic wrap and allow to stand at room temperature until mixture rises and then starts to collapse.  I put mine in a sunny window for a couple hours, or leave in a cool place for 6-8 hours.  The longer and slower it is allowed to rise, the more flavor it imparts.   At this point, you can also put it in the refrigerator to allow it to rise overnight.  If you do store in the refrigerator, allow the starter to come to room temperature before use.  The finished starter will be light, very bubbly, smell slightly milk & sweet, and will make a beautiful bread!
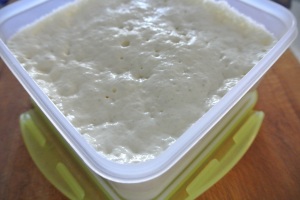
Ready!

Ready!

Delicious Sandwich Bread    makes 2 loaves

All the starter

1 packet  (1/4 oz) dry active yeast

1 1/2 cups warm water

2 Tablespoons olive oil

2 Tablespoons honey

2 cups whole wheat flour

about 3 cups bread flour

1/4 cup ground flax meal

1/4 cup wheat germ

2 Tablespoons sesame seeds

Combine the water and the yeast in the bowl of a stand mixer.  Stir to dissolve yeast.  Add all of the starter and the honey and olive oil.  Add the whole wheat flour, about 2 1/2 cups of the bread flour, the flax, wheat germ & sesame seeds.
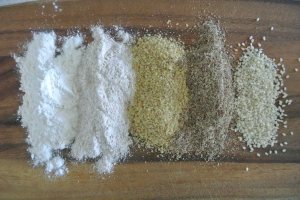
Delicious AND Nutritious!!

Delicious AND Nutritious!!

Using the dough hook, mix on low speed to combine.  Allow to mix for about 1 minute to determine if more flour is needed.  If needed, slowly add enough bread flour to make a moist, soft and sticky dough.  Mix about 3-4 minutes then allow dough to sit covered in the mixing bowl for about 10 minutes.  This will allow the flour to absorb more of the liquid and make it more manageable.  Turn dough out on counter, using a light dusting of flour if needed, and gently knead until smooth, about 1 minute.  The dough will spring back when a finger is pressed into it.  Place dough in a lightly greased bowl, cover and let rise until double.
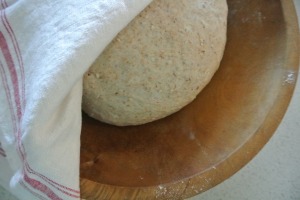
Peek-a-boo!

Peek-a-boo!

***At this point you can also let it rise in the refrigerator and bake it the next day.  This final rise will take longer since the dough will be cool.***

Lightly grease 2-9 inch loaf pans.  I like to dust them with additional wheat germ and flax meal but it is not necessary.
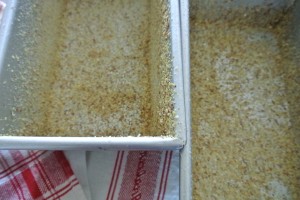
This adds a nice look and texture

This adds a nice look and texture


Once the dough has risen, fold dough in onto itself and divide into two even pieces.
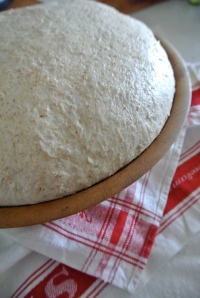
Ready to shape!

Ready to shape!

Roll piece out into a rectangle about the same length as the loaf pan.
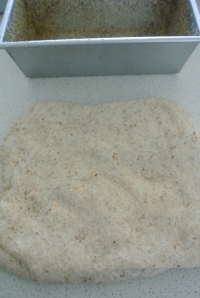
Keep the dough around the same length as the pan so it will fit well

Keep the dough around the same length as the pan so it will fit well

Roll the dough up tight like a jelly roll and pinch the seam to seal.  Place the dough, seam side down, into prepared pans.
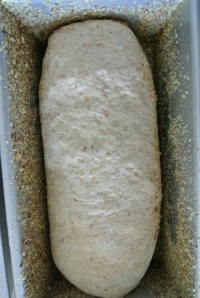
Perfect fit!

Perfect fit!

Cover and allow to rise to fill the pans.  Meanwhile, preheat oven to 400F.  Once dough is ready, I like to dust the top lightly with flour or wheat germ, but this is optional.
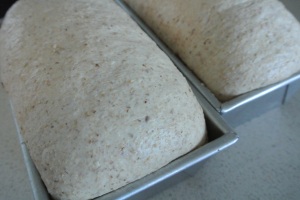
One step closer to tastiness!

One step closer to tastiness!

Bake the loaves in preheated oven for about 20-30 minutes, until they sound hollow when tapped.  Cool on racks for about 10 minutes, remove from pans and cool completely (well, almost!!).  Enjoy fresh!

Tips from A Cook

The starter and the bread dough can be made ahead of time.  Store in the refrigerator until use.  Remember colder doughs will rise much slower so you can work this into your timing.

Experiment with different whole grain flours and add ins!  Add delicious seeds such as sunflower and poppy for a nice texture and crunch.
Do the right thing…

Have tasty and healthy finally become friends??

Have tasty and healthy finally become friends??

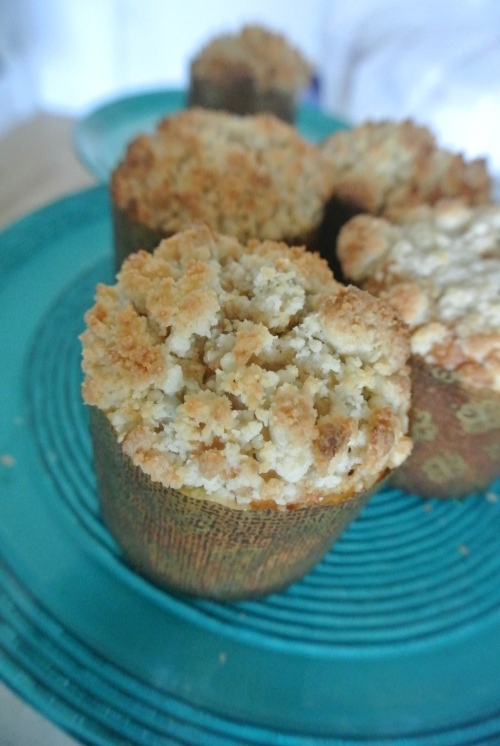
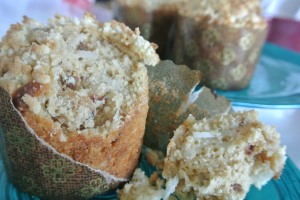
On occasion I make something that even my sister-in-law would give to her kids! : )  These muffins are made with less sugar than typical muffins (I resisted the urge to add more!!) and rely more on the natural sweetness of the over ripe bananas and honey.  It may look like there are a lot of ingredients here but you can easily  measure out everything the night before and assemble in the morning to start your day out right.  Easy!!

Do the Right Thing Muffins

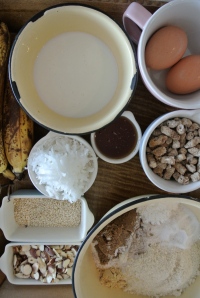
1 3/4 cups All purpose flour

2/3 cup Whole wheat flour

1 1/2 teaspoon baking powder

1 1/2 teaspoon cinnamon

1 1/2 teaspoon salt

1/4 cup packed brown sugar

1/4 cup shredded coconut

1/2 cup almond flour ** (see tip below)

1/2 cup toasted sliced almonds (or use 3/4 cup toasted, chopped walnuts!  I only had almonds)

2T toasted sesame seeds

3/4 cup chopped dates or raisins

2 ripe bananas, mashed

2 eggs

6T melted butter or oil

1/2 cup plain yogurt or buttermilk

2 Tablespoons honey

Streusel topping of your choice (what?  you don’t make big batches and store it in the freezer for occasions just like these??) OR other topping of choice: i.e. sunflower seeds, sesame seeds, or coarse sugar (mmmm….sugar!)

Ingredients ready to do the right thing

Ingredients ready to do the right thing

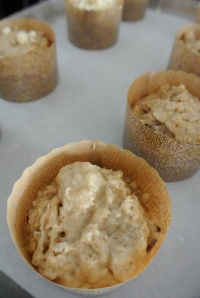
Preheat oven to 375F.  Combine the first 11 ingredients (all the dry ingredients) in a large bowl, breaking up any brown sugar.  Combine the remaining ingredients in another small bowl.  Blend well to be sure no large pieces of banana remain.  I use an immersion blender to blend all the wet ingredients together at once.  Add the wet ingredients to the dry ingredients and blend just until combined.   This is the key to creating more tender muffins–do not overmix!  Scoop into paper lined muffin pan

Uncensored topless muffins!

Uncensored topless muffins!

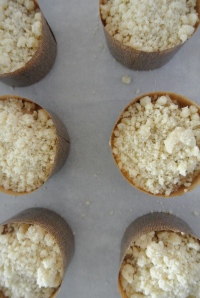
or free standing baking papers.  Top with topping if using.

Phew!  Back to "G" rating

Phew! Back to “G” rating!

Bake in preheated oven until a center of muffins test clean with a tooth pick.  Makes about 12 regular sized muffins.  These muffins can be frozen and are even tastier the next day.

Doing the right thing never tasted so good!! : )

Doing the right thing never tasted so good!! : )

Tips from A Cook:

Don’t have almond flour?  grind some sliced almonds with some of the dry ingredients (otherwise you may over process and end up with almond butter)

Make big batches of your favorite streusel topping and keep it in the freezer–always there when you need it : )

Use an ice cream scoop with a spring loaded handle to scoop muffin batter evenly into baking papers


Reward yourself…Fast!!

What are you waiting for??

What are you waiting for??

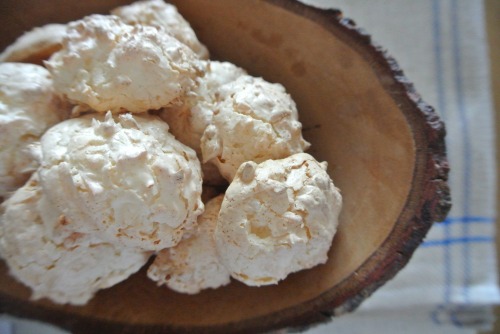
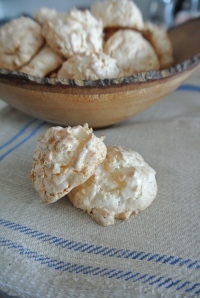
Sometimes the simplest recipes yield the tastiest results.  So true in the case of meringues.  Simple ingredients, fast assembly, delicious eating.  Here is a quick weekday treat that can be ready to eat in 30 minutes flat!  They are not only great on their own, but can be sandwiched with chocolate, nutella or jam, made larger and flatter (don’t forget to adjust cooking time!) they make excellent ice cream sandwiches.  Many possibilities!!!  And you don’t need to use a stand mixer if you don’t have one.  These can easily be made by hand and give your arms a workout at the same time : )

Coconut Meringue Cookies

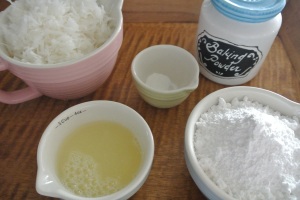
2 egg whites

2T sugar

3/4 cup powdered sugar, sifted

2 cups shredded coconut

1/2 teaspoon baking powder

1/2 teaspoon salt

1/2 teaspoon vanilla

Flaky salt for tops, optional

pinch of cream of tartar (optional--helpful if you are using pasteurized egg whites to help them whip well)

DSC_0706

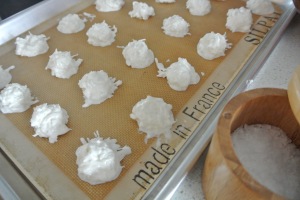
Line a baking sheet with a silpat or parchment paper.  Preheat oven to 325F.  In a clean, dry bowl, whip the egg whites well until soft peaks begin to form.  Slowly add the granulated sugar (mix with cream of tartar if using) and whip until stiff peaks form.  Slowly and gently fold in the sifted powdered sugar, baking powder and salt.  Gently fold the coconut and vanilla into the meringue.  Scoop or spoon small mounds (about 1 tablespoon each) onto prepared baking sheet.  I fit 24 per sheet–meringues do not spread a lot.  Top with a pinch of flaky sea salt if desired.  DSC_0710Bake in preheated oven for about 15 minutes or until pale golden brown (centers will stay slightly chewy), longer if you desire a crisper cookie.  Meringues will crisp up upon cooling.

Variations:  add mini chocolate chips!!  Or dip in melted chocolate once cool, top with a toasted almond–just like the candy bar…but better!

Ready to eat!!

Ready to eat!!

Tips from A Cook: 

Use a clean bowl when whipping whites.  Oil and grease can interfere with egg whites, affecting their ability to make a foam.

Did you break a bit of yolk into the whites?  Use half the broken shell to act a a scoop to pick it out of the white–your hands can’t capture it quite like the shell!!

Another nice thing about meringues–if they are not to your liking after cooking, you can re-dry them to make them crisper in the oven!  Just keep the oven temperature low or better yet, once the oven is reheated, you can turn it off and leave them in there overnight.


Happy Easter!!

Image

Getting my ducks in a row!!

I hope your day was full of…candy!! : )

Thanks, Easter Bunny!

Thanks, Easter Bunny!

All you need is…..

LOVE!

LOVE!


Love!  And so that time rolls around again…the day that people either love or hate.  Now come on people, don’t hate love!!  To me this time of year is like a mini Christmas–where stores jam the shelves with anything and everything heart shaped or even anything containing a heart can make the cut.  Personally, I just like all the red and pink sparkles and glitter and, of course, an excuse to eat more candy.  However I do have to say that the gift situation has gotten out of hand.  Gentleman:  Please take note!!  We do not need flowers and heart shaped boxes of chocolate to prove your love to us!!!  Diamonds will do just fine : )

Perhaps to further show your love for your honey this year you can make charming heart shaped macarons!  They only require 4 ingredients, a few drops of food coloring and the filling of your choice!  I have listed a few combinations at the end, but use your imagination and tailor it to your sweetheart’s tastes.  Who knows…maybe you will get some diamonds in return.  Yes, they are that good.


4 egg whites, room temperature

4 1/2 T sugar

1 3/4 cups powdered sugar

2 cups almond flour

Few drops of red or pink food coloring

special equipement:  Pastry bag with round tip (#806 works well or any will do depending on what size you make)

Silpats (or parchment paper)

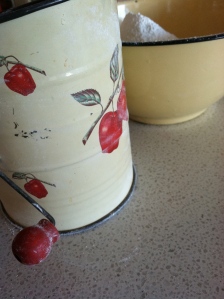
Sift together the almond flour and 10x sugar in a medium sized bowl (bowl should be big enough to fold the meringue into as well).  Set aside.

SIft together the almond flour and powdered sugar

SIft together the almond flour and powdered sugar

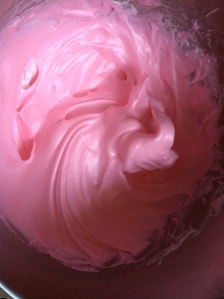
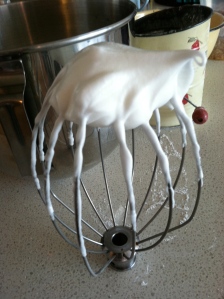
Using the whisk attachment, whip the egg whites, using medium high speed, until foamy and opaque.  Start to slowly add the sugar, about 1 tablespoon at a time and blending well after each addition.  Once a soft meringue is formed, add the drop or two of food color (if red is used, use very sparing as it doesn’t take much to turn the meringue pink).  Whip until the egg whites are thick and leave stiff peaks when the whisk is raised from the bowl.

Make sure your egg whites are stiff but still flexible and foldable

Make sure your egg whites are stiff but still flexible and foldable

IMG_2116

Egg whites prior to coloring


***Do not whip until dry and chalky–the whites will be stiff but still be “foldable” or “flexible”, meaning that they can be folded into something and do not break apart when a spatula is draw through them.***

Fold about 1/2 (or slightly more) into the dry ingredients.  At this point you can fold pretty aggressively.  The point is to blend in the whites to make a smooth paste.  No lumps should be visible when you are finished here.

Make sure no lumps remain after folding in the first part of the egg whites

Make sure no lumps remain after folding in the first part of the egg whites

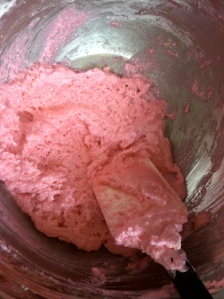
Gently fold in the remaining whites.  You can be delicate now.  The final batter should be free of streaks of egg white, yet still slightly thick–about the consistency of thick pancake batter or thin oatmeal (but smooth).  Try not to mix too much since the more you mix, the runnier the batter gets which is not good!

Load the batter into a pastry bag fitted with a round tip.

Ready to pipe!

Ready to pipe!

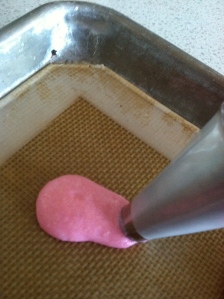
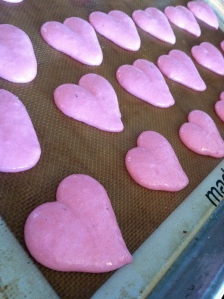
Line 2-3 half sheets with silpats (or if using parchment, use a dab of the batter to hold down the sheet in all 4 corners).  Pipe out heart shapes by making 2 strokes–each one squeeze more at the beginning and pull diagonal to a thin end point.  The batter should slowly slag to fill out the heart shape.  Repeat until all the batter is used.

Step 1

Step 1


Step 2

Step 2

Feel the love

Feel the love

Let the sheets sit until the tops are dry to the touch.  This usually take about 30-45 minutes, depending on the humidity in your room.  It is important to let the macarons dry–if the tops are still tacky then they may crack in the oven.  Once the tops are dry, start to preheat your oven to 325F (still oven) or 300F (convection).  If using parchment paper, you may want to double the pan if you can when baking to avoid excess heat to the bottom of the macarons.  Silpats, I have found, work fine on their own.  If you dont have endless pans to double up, you can bake them one sheet at a time, turning them often.  Bake for about 8 minutes (again, depending on the size of macaron and your oven,  this may need to be adjusted up or down).  The macarons should puff slightly, have an attractive “foot” and should be dry to the touch.  You do not want them to brown or they will be crunchy–and we dont want that.  Ideally they should be crisp on the outside and chewy on the inside.

Remove from oven and, if using parchment, put a couple teaspoons of water (don’t drown them!!!) BETWEEN the paper and the sheet pan.  This will create some steam to help you remove them.  If you have used too much water, try to remove the paper from the sheet pan to cool so they are not sitting in water.  Use caution when doing this as STEAM BURNS HURT.  Trust me, I know.  Allow the macarons to cool.  Match similar sized tops and bottoms and fill with desired filling.  Sandwich together.  Package up nice for your sweetheart.  Get ready for that tennis bracelet…..

Some filling suggestions!

Favorite ganache

Butter cream

Jam

Cream cheese frosting with strawberry or other fruit jam (think strawberry cheesecake!!)

Mousse (probably want to eat that day as it may get soggy after a day)

Your honey’s favorite flavors : )

Tips from A Cook

 Be sure to be gentle on the second addition of whites to the batter.  If you overmix, you cannot fix it

Be sure the macarons are dry to the touch before they go in the oven.  They will squish if you press hard–but just be sure they have a skin that will not stick to your finger when lightly touched.

Macarons can be filled one  day ahead.  Store in refrigerator well wrapped, allow to come to room temperature to serve.